Difference between revisions of "Harry Potter Effect"
m (moved Harry Potter effect to Harry Potter Effect: Standardized name) |
(How to possibly FIX the HP effect. You need a bit of hex experience, and some values from a Ninty course.) |
||
| Line 12: | Line 12: | ||
{{youtube-box||doSSAli8hl4|Harry Potter Effect}} | {{youtube-box||doSSAli8hl4|Harry Potter Effect}} | ||
| + | |||
| + | == How to fix == | ||
| + | |||
| + | :'''TODO: Add pictures to make things easier''' --[[Guilmon35249vr]] | ||
| + | |||
| + | '''Required tools:<br> | ||
| + | ''BrawlBox 0.65b (or newer, possibly)<br> | ||
| + | ''SZS Modifier<br> | ||
| + | ''CTools<br> | ||
| + | ''a hex editor (You're only replacing bytes with 00's. You cannot use CTools' hex editor.)<br> | ||
| + | ''Rainbow Road's SZS (or a texture hack/model hack thereof)<br> | ||
| + | <br> | ||
| + | |||
| + | 1) Extract '''your course_model.brres''' and '''Rainbow Road's course_model.brres''' (name them differently so you can tell them apart, like ''course_ct.brres'' and ''course_RR.brres''). | ||
| + | |||
| + | 2) Open both of them in ''BrawlBox''. | ||
| + | |||
| + | 3) In both windows, go to '''3DModels''' then '''course'''. From there, open the '''Shaders''' folder. | ||
| + | |||
| + | 4) In '''Rainbow Road's brres''', click ''Shader4''. | ||
| + | |||
| + | 5) In '''your brres''', you need a new Shader. Right-click '''"course"''' (With the mdl0 icon next to it) then select ''"Add New Shader"''. You should see a new ''"Shader2"'' in your Shaders folder. | ||
| + | |||
| + | 6) Make your new ''Shader2'' be exactly the same as Rainbow Road's ''Shader4'', or as close as possible (from there, you can change it however you like). | ||
| + | |||
| + | 7) Go to '''your brres' ''Materials'' folder''' and then select the name of the material you want to edit. If you used CTools to create the model, they'll have the same name as the ''polygon'', but with "_m" added to the end. | ||
| + | |||
| + | 8) On the right-hand side, scroll down until you see '''Shader1''' in bold text. Click it and choose '''Shader2''' instead. | ||
| + | |||
| + | 9) Save your brres file and open it in SZS Modifier. | ||
| + | |||
| + | 10) Click on '''"."''' then click on '''"course_model"''', then click on '''"course"'''. | ||
| + | |||
| + | 11) The model editor will get stuck at "Parsing". This is because BrawlBox writes invalid pointers inside the MDL0 for sections your model is missing. Let's fix that. | ||
| + | |||
| + | 12) Close the model editor. | ||
| + | |||
| + | 13) Right-click ''course'', '''not course_model''', and click "Extract Raw Data". (You can't save time by doing this in BrawlBox, as BB puts the BRRES subnames at the end). Save it as something you can remember, like '''"CT_MODEL.mdl0"'''. | ||
| + | |||
| + | 14) Open the mdl0 in your hex editor. | ||
| + | |||
| + | -Hex talk starts here- | ||
| + | |||
| + | 15) At 0x28, there will be 8 bytes of seemingly garbage data. '''Make sure you're in 'overwrite' mode, not 'insert' mode''', and change these all to 00's. | ||
| + | |||
| + | 16) At 0x40, there's another 8 bytes of garbage data. Make these 00's too. | ||
| + | |||
| + | 17) Save. | ||
| + | |||
| + | -hex talk ends here- | ||
| + | |||
| + | 18) In SZS Modifier, right-click ''course'' (again, '''not course_model''') and click '''"Import Raw Data"'''. | ||
| + | |||
| + | 19) Select your model. It will automatically open the model editor, though your model may not show up, ''you can still see the polygon names, and it's been inserted fine''. If you're not sure, close the model editor, select something else and then re-select ''course''. This will re-load the model editor, and you can see your course model. You can even see the transparency better now! | ||
| + | |||
| + | 20) Save the brres file, close SZS Modifier, and open SZS Explorer (CTools). | ||
| + | |||
| + | 21) Open your course's SZS file in SZS Explorer. | ||
| + | |||
| + | 22) Inside the "." folder, replace '''"course_model"''' with your new brres. You should double-check to make sure CTools can load the model too by double-clicking the brres after it's replaced, from inside CTools. | ||
| + | |||
| + | 23)If the model loads fine (or you're really confident), save your SZS file. | ||
| + | |||
| + | 24) Try it in-game! If you're up for a bigger challenge, try making your own shader! (Shaders are very sensitive. A wrong value can freeze the Wii or cause abnormal results, such as these: [http://i349.photobucket.com/albums/q364/MikeYoshi/RMCJ01-19.png 1][http://i349.photobucket.com/albums/q364/MikeYoshi/RMCJ01-20.png 2] | ||
| + | |||
| + | 25) SUCCESS! YOU WON! [http://i349.photobucket.com/albums/q364/MikeYoshi/RMCJ01-21.png Ness gained 24 exp.] (Even though this one had a wrong uv map setting) | ||
| + | |||
| + | --) If it doesn't seem to work (you still see the HP effect, or you get a glitchy result like above), also try mimicking Rainbow Road's '''"b_saku"''' material, but with your own texture names and properties. | ||
[[category:Bug]] | [[category:Bug]] | ||
Revision as of 04:55, 21 January 2012
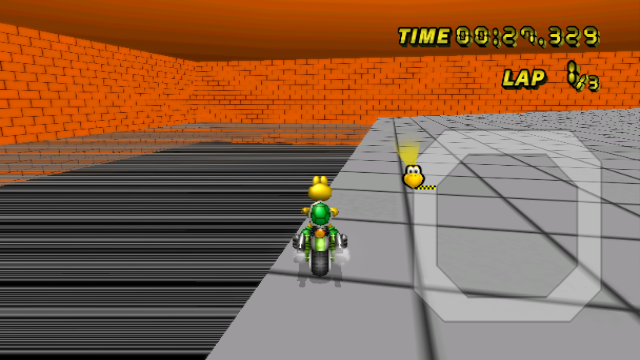
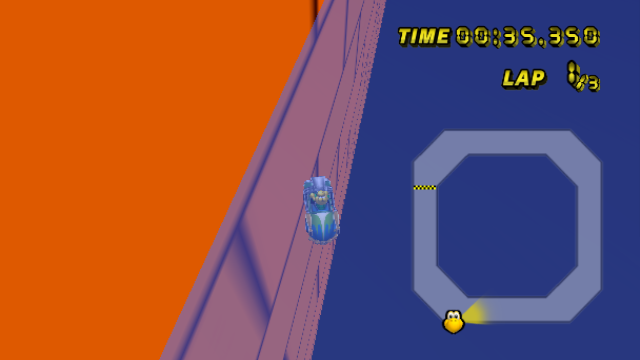
The "Harry Potter effect" is a texturing glitch that appears only in newer custom tracks. That's because newer track models are created with the BRRES Editor, that currently has this glitch. This bug won't happen if you use only the SZS Modifier to create your custom tracks. It's named like that because of Harry Potter's invisibility cape - it's not invisible, but it covers what's behind it.
This glitch happens if the transparent polygons in the BRRES file appear before the normal ones. The previous polygon will always appear on top of the later one, even if it's transparent.
To fix it, you need to have the transparent polygons as the last ones of the BRRES file. To do this you have to set the transparent polygons to be the last ones in the OBJ file. In 3DS Max you can set the order of the polygons. Google Sketchup uses the texture names for the order, so you need to change the texture names so that they're the last ones.
This will, however, still happen if a transparent polygon is behind another. To fix this, you have to change the order of the polygons even more.
Example Video
How to fix
- TODO: Add pictures to make things easier --Guilmon35249vr
Required tools:
BrawlBox 0.65b (or newer, possibly)
SZS Modifier
CTools
a hex editor (You're only replacing bytes with 00's. You cannot use CTools' hex editor.)
Rainbow Road's SZS (or a texture hack/model hack thereof)
1) Extract your course_model.brres and Rainbow Road's course_model.brres (name them differently so you can tell them apart, like course_ct.brres and course_RR.brres).
2) Open both of them in BrawlBox.
3) In both windows, go to 3DModels then course. From there, open the Shaders folder.
4) In Rainbow Road's brres, click Shader4.
5) In your brres, you need a new Shader. Right-click "course" (With the mdl0 icon next to it) then select "Add New Shader". You should see a new "Shader2" in your Shaders folder.
6) Make your new Shader2 be exactly the same as Rainbow Road's Shader4, or as close as possible (from there, you can change it however you like).
7) Go to your brres' Materials folder and then select the name of the material you want to edit. If you used CTools to create the model, they'll have the same name as the polygon, but with "_m" added to the end.
8) On the right-hand side, scroll down until you see Shader1 in bold text. Click it and choose Shader2 instead.
9) Save your brres file and open it in SZS Modifier.
10) Click on "." then click on "course_model", then click on "course".
11) The model editor will get stuck at "Parsing". This is because BrawlBox writes invalid pointers inside the MDL0 for sections your model is missing. Let's fix that.
12) Close the model editor.
13) Right-click course, not course_model, and click "Extract Raw Data". (You can't save time by doing this in BrawlBox, as BB puts the BRRES subnames at the end). Save it as something you can remember, like "CT_MODEL.mdl0".
14) Open the mdl0 in your hex editor.
-Hex talk starts here-
15) At 0x28, there will be 8 bytes of seemingly garbage data. Make sure you're in 'overwrite' mode, not 'insert' mode, and change these all to 00's.
16) At 0x40, there's another 8 bytes of garbage data. Make these 00's too.
17) Save.
-hex talk ends here-
18) In SZS Modifier, right-click course (again, not course_model) and click "Import Raw Data".
19) Select your model. It will automatically open the model editor, though your model may not show up, you can still see the polygon names, and it's been inserted fine. If you're not sure, close the model editor, select something else and then re-select course. This will re-load the model editor, and you can see your course model. You can even see the transparency better now!
20) Save the brres file, close SZS Modifier, and open SZS Explorer (CTools).
21) Open your course's SZS file in SZS Explorer.
22) Inside the "." folder, replace "course_model" with your new brres. You should double-check to make sure CTools can load the model too by double-clicking the brres after it's replaced, from inside CTools.
23)If the model loads fine (or you're really confident), save your SZS file.
24) Try it in-game! If you're up for a bigger challenge, try making your own shader! (Shaders are very sensitive. A wrong value can freeze the Wii or cause abnormal results, such as these: 12
25) SUCCESS! YOU WON! Ness gained 24 exp. (Even though this one had a wrong uv map setting)
--) If it doesn't seem to work (you still see the HP effect, or you get a glitchy result like above), also try mimicking Rainbow Road's "b_saku" material, but with your own texture names and properties.