BrawlBox Tricks
This page is a part of the Custom Track Tutorial. Back to the main tutorial page.
Introduction
This page describes several tricks to do in BrawlBox.
The Creating a BRRES with BrawlBox page contains mainly information regarding how to create the BRRES from scratch using BrawlBox, but which also might be useful when editing an existing BRRES.
Make Sure BRRES Works
Sometimes you may have a bit of trouble getting a BRRES made with CTools to open with BrawlBox, namely getting the MDL0 to open. There are multiple possible solutions to this problem:
- If you have 3ds Max or a similar powerful modelling program, delete any "default material" meshes using 3ds Max, then export using its OBJ exporter.
- Re-open your new BRRES with the CTools BRRES Editor. Save, and it should now open with BrawlBox. Remember that you will need to reimport any textures that you want to use mipmaps in BrawlBox, because CTools creates TEX0 files that refuse to display anything but the first mipmap.
- If for any reason the above methods failed, then you can open the SZS with your BRRES in it with the SZS Modifier. Open the Model with the SZS Modifier Model Editor, save, and the model should now work in BrawlBox.
Important! Sometimes the SZS Modifier will cause textures to become doubled in game after saving them. To resolve this issue, set every non-doubled texture's Texture Coordinate scale to (1,1), and every doubled texture's to (2,2).
If you use 3ds Max, you can add XForm UVW for all meshes with U and V 0,5 (Make sure "Apply to entire object" is ticked) to fix this problem. If you use SketchUp, just scale the materials for twice. (For example 2000 to 4000.)
Fix: Facepoint descriptor does not match linked nodes
When you want to open a model made with CTools and fixed with SZS Modifier with newer versions of BrawlBox you will get the following error when you try to open your MDL: http://prntscr.com/a3mvcd BrawlBox will auto fix some issues in your BRRES, but this will make your textures distorted or solid color in game. To repair your textures open the UV folder inside your BRRES and set in EVERY reference "Force Float" and "Force Rebuild" to True. (Don't worry if one of the settings reset itself after you saved your file). Afterwards you still have to set your texture scale to (1,1) in your materials.
Material Related
Redirecting Materials
Sometimes, if creating a BRRES with CTools, there are duplicate textures. This can create extra materials, adding unneeded strain on the Wii. You can fix this using BrawlBox.
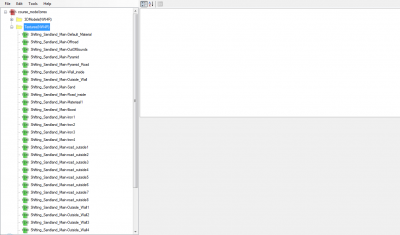
Open your course_model.brres in BrawlBox and open the textures folder.
Find the file name of the duplicate texture. Copy down the original texture name.
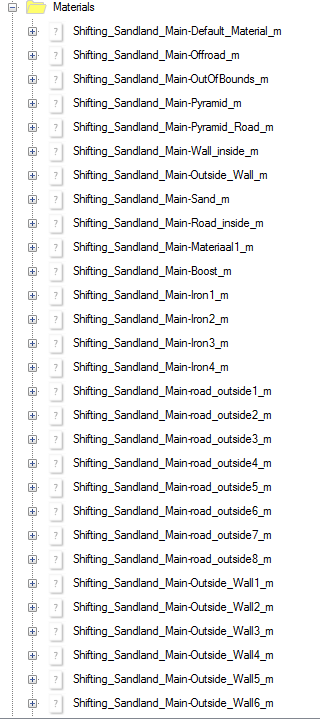
Go into the MDL0 and into the Materials Folder.
Find the material with the duplicate texture.
Using the original texture's name, open the material and rename the texture node to that.
Optional: You can delete the duplicate texture(s) now.
Save the course_model.brres and import it into your SZS.
Opacity
Enabling opacity on a mesh/polygon: see this section. This will fix the Harry Potter Effect.
Culling
Special culling settings are mostly used for models which should be seen from both sides like fences. To set the culling, edit the CullMode setting in the material. See this section.
Mipmaps
A mipmap is a smaller, more pixelated version of a texture which is stored in most TEX0 files. In a 3D display, smaller mipmaps are rendered at farther distances. The bigger a texture is scaled, the farther you must go to trigger a smaller mipmap. Mipmaps may help reduce GPU load, reduce moiré pattern, and can also create the effect of textures changing based on distance. This is used on Rainbow Road on the road, and Lunar Spaceway on the stars which change color based on how far away you are from them. Mipmap 1 is the closest and biggest, and mipmap 5 is the smallest and farthest (after that you are too far away to see the texture), however a TEX0 file can store any number of mipmaps as needed.
- Set mipmaps to display in the material: Browse to the "Materials" folder in the MDL0. Under each material's subfile(s) you will find the setting "MinFilter". Set it to Linear_Mipmap_Linear instead of Nearest.
- Make sure the TEX0 file the material uses actually has mipmaps. If it doesn't, you can add them in BrawlBox by right clicking the texture and selecting "Re-Encode".
→ See more information here.
→ To make mipmaps with Wiimms Image Tool or to make mipmaps different textures, see this tutorial.
Model Related
Optimization
It is possible to optimize a track's face-point count using BrawlBox's Tripstripper.
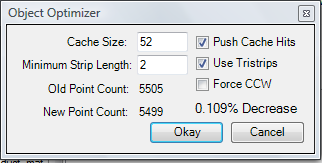
Open the course_model.brres in BrawlBox and go into MDL0. Right-click and click Optimize Meshes.
Dialog:
- [CheckBox] - Use Tripstrips - This enables the usage of the tripstripper. Have this on.
- [TextBox] - Cache Size - This often lowers the face-point amount, however it might not. Set this to a lower number.
- [TextBox] - Minimum Strip Size - This says how low BrawlBox can strip the face-point amount. Don't bother changing this one.
Click ok when done. Now save your BRRES and import into the SZS file. Test in-game.
Main Tutorials
Introduction –
Textures –
Scale –
Modeling ⇒ Using Blender –
BRRES: CTools
BRRES: BrawlBox –
BRRES: RiiStudio –
Minimap –
Solidity –
KCL: Wiimms Tools –
KMP Editing
Object Editing –
Cameras –
Cannons –
Post-effects –
Videos
Battle Arenas
Battle Arenas –
Enemy routes in battle arenas ⇒ Using Wiimm's Tools –
Coins
Misc. Tutorials
Getting Files –
BrawlBox Tricks –
Animations –
Shadows –
Mipmaps
Custom Effects –
Moving Terrain –
Music –
Ports –
Paint Remakes –
Tutorial Archive
Extended presence flags: Track Tutorial –
LE-CODE Track FAQ
Testing and Reviewing
Testing a Track –
Visual Review –
Track Transformation –
Fixing Errors
Software
3D Tools –
BrawlBox –
CTools Pack –
KMP3D –
KMP Cloud –
KMP Modifier
Lorenzi's KMP Editor –
MagicY –
Material Tool –
Post-Effect Editor –
Wiimms SZS Tools –
Wiimm's Tool Manager
Other
KMP Objects –
Custom Objects –
Model Database –
Tutorial Archive


