Animations
This page is a part of the Custom Track Tutorial. Back to the main tutorial page.
Introduction
This page will teach you how to create custom animations for your textures and models using BrawlBox. Note that BrawlBox may be more reliable for this than BrawlCrate, depending on what you're working with.
Model Animation (CHR0)
Yet to be done
Texture Animation (SRT0)
Creating a new SRT0 animation
To create a new SRT0 animation, open your BRRES file in BrawlBox.
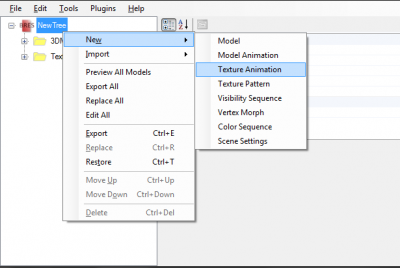
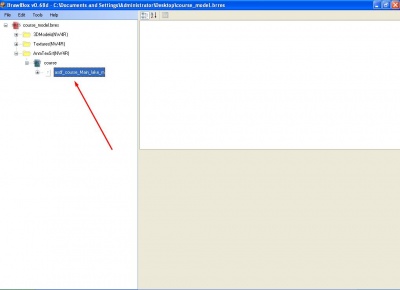
Go to Edit → New → Texture Animation. A new SRT0 file will be created in the AnmTexSrt(NW4R)folder.
The version of the SRT0 file must be 5, or else your game will freeze. The frame count is the total amount of frames your animation will have; remember Mario Kart Wii runs at 60 frames per second. Loop can be set to true or false; a looped animation will cycle endlessly and a non-looped one will only play once.
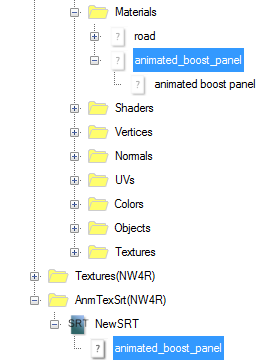
Add a new material reference to the SRT0 by right clicking it or pressing Ctrl+N. Name this new reference the same name of the material you want to animate. You can add as many materials as you like to one file, but all of them will have the same amount of frames. You can create new SRT0 files if you want different amount of frames, or a non-looped animation on a different material.
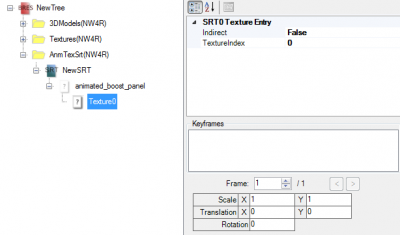
Add a new texture reference to the material in the SRT0 by right clicking it or pressing Ctrl+N. To create the animations, you must set positions, rotations or scale for each key frame:
- Scale defaults to 1x1. If you have the X scale set to 1 in frame 0 and the X scale set to 2 in frame 150, the texture will scale itself on the X-axis from 1 to 2 times on the course of the frames. This overrides the scale set in the material. If 150 is the last frame, the texture will instantly scale back to 1 on the next frame, so for a smooth scale you must set it to decrease back to 1 on another key frame.
- Translation is what you'll likely be working with the most on SRT0 animations. A translation of 1 on either X or Y-axis means the texture will move itself one time in that axis. If on key frame 0, the Y translation is set to 0, on frame 100, the Y translation is set to 3, and on frame 200, the Y translation is set to -2, the texture will move itself three times towards the Y-axis on the first 100 frames, and then backwards 5 times from frame 100 to 200.
- Rotation is difficult to work with, unless you know what you're doing while UV mapping. It ranges from 0 to 360 degrees.
To set a key frame, simply navigate to the frame you want and set a number in one of the boxes. The set value in the key frame will turn yellow. To unset it, remove everything from the box (leave it blank) and press Enter.
Note: Mario Kart Wii supports up to 8 different SRT0 animations.
Port an existing SRT0 animation
To port an existing animation, such as water, you will need to first export a base SRT0.
- First, extract a Nintendo track's SZS and then export the course_model.brres, then open it in BrawlBox.
- Then find AnmTexSrt(NW4R) and open it and export the SRT0 file. Next go into the MDL0, and go into the materials folder and find the water's material. Export that material.
- Then click on the material and look which shader it is linked to. This is important, because layered materials need a different shader than normal materials (otherwise they skip the Shader steps). Export that shader.
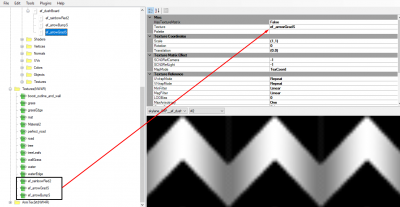
- Then go to the textures folder and export the textures with the same names as the references (I.E. yo_wave_tex, ef_prj_glow) as a TEX0 file.
Then open your course_model with BrawlBox.
- First right click on the BRRES and go to Import then Texture Animation.
- Import the SRT0 you exported earlier.
- Then open the MDL0 and go to materials and find your water. Replace it with the material we exported earlier.
- Add a new Shader and replace it with the one you extracted before; make sure the order of the materials is set properly, as specified here.
Important: Newer versions of BrawlBox might mess up the MDL0's texture references when you simply replace your Material with the one you ported from Nintendo tracks, which will lead to a freeze on Wii. To prevent this, go to the MDL0's Textures folder (not the Textures(NW4R) folder of the brres) and either delete the texture reference of your dummy-texture before you import the material or delete it afterwards. Make sure there are no incorrect doubled or unlinked entries in the MDL0's Textures folder.
Import the TEX0 textures you took from the base. Make sure they link to the references in the material. You can delete the old one after that.
Then copy the material name and rename the SRT0 entry to the same thing.
Save and import back into your SZS.
Flickering bug in ghost replay
A common issue with animations imported from other tracks is that these materials start flickering when watching or racing a ghost in time trial. This is caused by a bug in Brawlbox where it does not write all correct settings to the material. This issue can be resolved by hex editing the material file: open the file in your favourite hex editor and navigate to offset 0x56a. In most material files, this should address will follow the sequence 61 25 00 00 00 61 26 00 00 00. If this is not the case, read the following paragraph to get a correct offset. At this location there should be a range of zeroes to offset 0x5a0 in the case of a corrupted material. If this isn't the case, and the sequence from 0x56a starts with 61 06, then the flickering can not be solved with this method. Otherwise, read the following paragraph to find a proper offset.
If offset 0x56a is incorrect or not free to use, then a replacement address can be found by navigating to the offset that is given at offset 0x3c. In almost every case, this offset will be 0x4c0. Then from this offset, find the first sequence of at least 18 zeroes. Leave the first three zeroes emtpy and start writing hex at the fourth one.
At the found offset write the following sequence of bytes: 61 06 00 03 - d7 61 07 de - b8 00 61 08 - 00 00 00. This will add a proper indirect texture matrix, which is often used by animated materials. Save the file and replace the material in Brawlbox. If it worked correctly, the material should no longer flicker in ghost replays. If the flickering still occurs, then Brawlbox might have undone the fix. In that case it's recomended to download the alternative Brawlcrate to replace the material.
In most cases the hex of the fixed area will look like this.
Texture Pattern (PAT0)
PAT0 files control swapping textures, like a GIF. It swaps through textures to simulate animation. You can use BrawlBox or Wiimms SZS Tools to edit PAT0; similarly to how it handles KMP files, Wiimms Tools convert a PAT0 to text and back.
Importing Textures
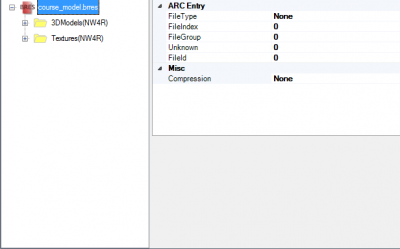
Open up your copy of Brawlbox and open your course_model.brres.
Right-click the image of the BRRES file in BrawlBox. If you have a folder with all your textures, click Import → Folder and browse for the folder. If not, click Import → Texture and import them one by one. Make sure they have the correct Image Format.
Creating a new PAT0 animation
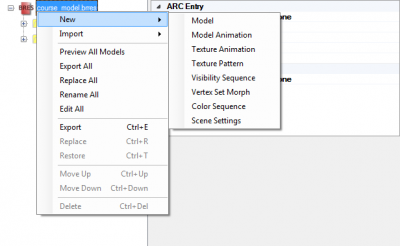
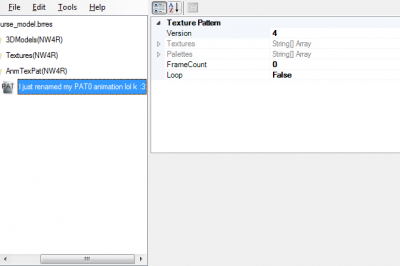
Once done importing new textures in Brawlbox, you'll want to create a new PAT0 animation by Right-Clicking the BRRES image and clicking New → Texture Pattern.
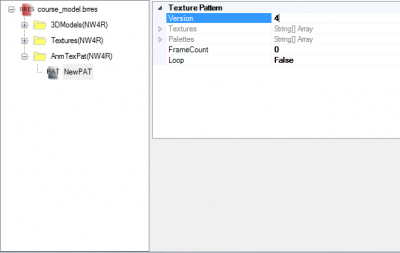
Go into AnmTexPat(NW4R) and click on NewPAT. Change the version number to 4. This is necessary because Mario Kart Wii uses a different version PAT0 than Super Smash Brothers Brawl.
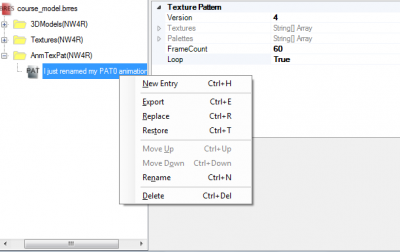
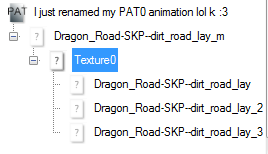
You are free to rename the PAT0 to a different name. This will not affect the actual animation.
Set the FrameCount, as this dictates how long each texture will be on screen.
- NOTE! Depending on how many textures you have, this number will be different. For example, If I have 5 textures I want to animate, I'd need 60 frames, because texture 5 needs frames also, or else the animation will skip the fifth texture and go to the first (if you have it set to loop, if not, it'd just stop).
Creating and Linking Entries
Now we'll get into the actual animating. To start off, right click the newly created PAT0 and click "New Entry".
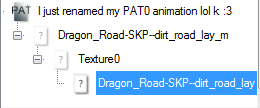
Click the + and you should see a node called "NewNode". Now, go into the MDL0 (it should be in 3DModels(NW4R)) Now go into MDL0 → Materials. You should see some materials. Find the one that has your texture first texture. Copy down the Material's name.
Go back to your PAT0 animation and rename the "NewNode" to the Material Name. This will link the Animation entry to the texture.
Now open the entry and Texture0. You should see a node called "NewTexture". Rename it to the actual texture name.
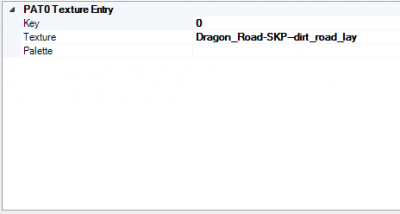
Take notice of the Option "Key". This dictates when the texture will start.
Now, right-click "Texture0" and click "New Entry". Do this for how many textures you have for animation. Rename those to the correct texture name.
Set the Key Frame Start for each one.
Save the BRRES and import it to your SZS. Test in-game to see if your animation works.
Color Sequence (CLR0)
Creating a new CLR0 animation
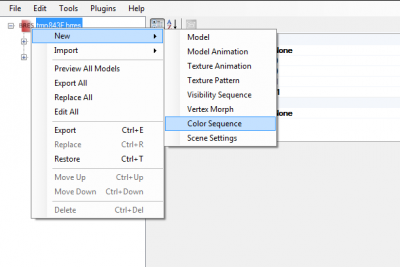
First in the brres, go to Edit → New → Color Sequence.
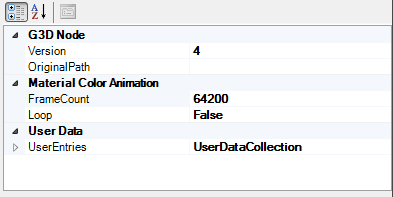
Next change Version to 4, add the desired amount of frames and set the loop to true or false.
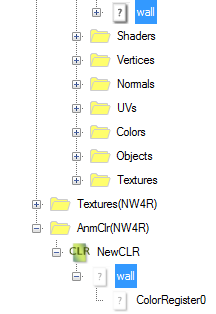
Right click on the CLR0 and click New Materiel Entry. Replace the MaterialName with the material that you want to use.
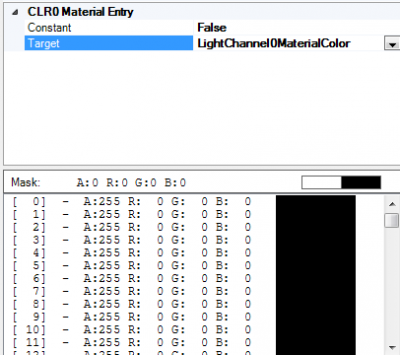
Next in ColorRegister0 change the Constant to False and change target to LightChannel0MaterialColor.
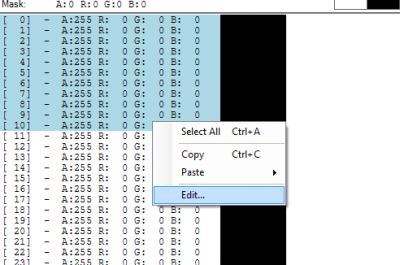
Next highlight (either by click and dragging, shift clicking or Ctrl all) an area than right click and edit.
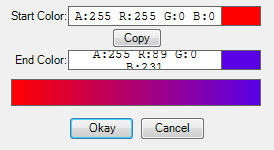
Select two colors for the Gradiant Fill.
Targets
A list of Targets and there effects:
LightChannel0MaterialColor: Alpha in mask is ignored.
LightChannel1MaterialColor: unknown
LightChannel0AmbientColor: Alpha in mask is ignored, slightly lighter than LightChannel0MaterialColor.
LightChannel0AmbientColor: unknown
ColorRegister0: unknown
ColorRegister1: unknown
ColorRegister2: unknown
ConstantColorRegister0: unknown
ConstantColorRegister1: unknown
ConstantColorRegister2: unknown
ConstantColorRegister3: Shadow map needed, Alpha only, Transparency in Textures are ignored, Mask is ignored.
Links
Main Tutorials
Introduction –
Textures –
Scale –
Modeling ⇒ Using Blender –
BRRES: CTools
BRRES: BrawlBox –
BRRES: RiiStudio –
Minimap –
Solidity –
KCL: Wiimms Tools –
KMP Editing
Object Editing –
Cameras –
Cannons –
Post-effects –
Videos
Battle Arenas
Battle Arenas –
Enemy routes in battle arenas ⇒ Using Wiimm's Tools –
Coins
Misc. Tutorials
Getting Files –
BrawlBox Tricks –
Animations –
Shadows –
Mipmaps
Custom Effects –
Moving Terrain –
Music –
Ports –
Paint Remakes –
Tutorial Archive
Extended presence flags: Track Tutorial –
LE-CODE Track FAQ
Testing and Reviewing
Testing a Track –
Visual Review –
Track Transformation –
Fixing Errors
Software
3D Tools –
BrawlBox –
CTools Pack –
KMP3D –
KMP Cloud –
KMP Modifier
Lorenzi's KMP Editor –
MagicY –
Material Tool –
Post-Effect Editor –
Wiimms SZS Tools –
Wiimm's Tool Manager
Other
KMP Objects –
Custom Objects –
Model Database –
Tutorial Archive
