Texturing
This page is a part of the Custom Track Tutorial. Back to the main tutorial page.
Introduction
You should follow this page if you plan to create a Texture Hack.
Course Texture Replacement
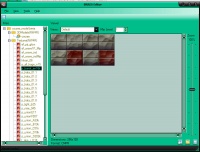
To change the textures that are used in a level, you can use CTools, which includes SZS Explorer, the BRRES Editor and several other programs. Open the level (the SZS file) in SZS Explorer. Find course_model.brres in the file listing, and click 'open' to open the course model in the BRRES Editor. Take a look at the Textures(NW4R) folder in the editor window. You'll see a long list of all textures used in the course. You can click a texture to see a preview. Be careful not to scroll through the textures too quickly because it can make the program crash. Other BRRES files in the SZS are various objects; you can edit these textures as well. If you're editing a bike or kart, the process is the same; just open the appropriate SZS.
To export a texture, click on the floppy disk icon in the bottom right corner of the BRRES Editor window. To import a texture, click the folder icon, also in the bottom right corner of the window. Select your new or edited image file (multiple formats and transparency are supported), but remember to import a texture in which the dimensions are powers of 2 depending on the image format (it's the block size.) If you're not sure what size to use, just choose any power of 2.
Examples of valid dimensions:
- 16*16
- 32*64
- 128*256
- 512*32
There does not appear to be an upper size limit; however it is not recommended to import a texture with dimensions greater than 1024*1024. This is to prevent frame rate slow down in your level caused by insufficient game memory. One 1024*1024 texture is equal to four 512*512 textures or sixteen 256*256 textures, so try to keep your edited images either the same size as the original, or only a bit larger.
After importing the new texture, it should appear on the editor. Remember to save regularly. It's also a good idea to keep both a backup of the original SZS and an older version of your edited level in case something goes wrong.
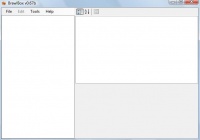
You can also use BrawlBox to edit the textures in the BRRES.
An image listing
If you using Wiimms SZS Tools you can list all images of a BRRES or SZS file using the command:
wszst ilist -al FILE_TO_OBSERVE
It creates a list like:
file   image     mip  width     image
type   type      map  height     size  file path
-------------------------------------------------------------------------------
BRRES   - -       -     -           -  ./course_model.brres
TEX    03 IA8     -   64*32      4096    Textures(NW4R)/ef_arrowBumpS
TEX    03 IA8     -   32*32      2048    Textures(NW4R)/ef_arrowGradS
TEX    01 I8      -   64*64      4096    Textures(NW4R)/ef_prj_glow
TEX    04 RGB565  -   32*8        512    Textures(NW4R)/ef_rainbowRed2
TEX    01 I8      2   64*64      4096    Textures(NW4R)/ef_wave1P_Mip
...
BRRES   - -       -     -           -  ./itembox.brres
TEX    04 RGB565  -   32*32      2048    Textures(NW4R)/ef_cNoise
TEX    04 RGB565  2  128*128    32768    Textures(NW4R)/ef_dotRot20s
...
Multiplayer Versions
Mario Kart Wii has two versions of every course. The first is the single player version that contains all the eye candy and cool effects. The multiplayer version is stripped down and optimized for split-screen play. Multiplayer versions of levels have a _d appended to the end of the file name (castle_course.szs is Mario Circuit and castle_course_d.szs is the multiplayer version). Be sure to edit both versions of the course; if you have any especially high resolution textures you should downsize them in the multiplayer version.
UV Mapping
Changing the UV mapping (texture mapping, placement) of a model is considerably more complicated than replacing textures. It requires exporting the level, editing it in a 3D modeling program, then reimporting it. See the Importing 3D models tutorial to learn how to export the model. Then you must create a new BRRES (using CTools or BrawlBox) to reimport the edited model.
Other Changes
You may want to make other changes to the level beside textures. See the Post-effects article for information about changing lighting and post-effects. If you would like to change other aspects of your level, such as most of the KMP and KCL, it will not be considered only a texture hack and thus not be playable online as a replacement for the normal track. This type of edit is known as a Track Edit. The Object Editing article covers porting objects from other levels. The KMP Editing tutorial explains how to change object placement, the player start, checkpoints (useful for a reverse course) and enemy AI. Road, wall and terrain properties are covered in the Solidity tutorial; these are changed by editing KCL flags.
Character Texture Replacement
You may have noticed that when you import textures with the BRRES Editor, the textures in-game become corrupted, or the character moves in a spasm like way.
To fix this, you will need BrawlBox and SZS Explorer. Using SZS Explorer, Export whatever BRRES files you want to edit, by right-clicking over the .BRRES and clicking "Export". Save it to a place of choice. Next, open your .BRRES(s) in BrawlBox. Open the Texture(s) folder and right click over the name of the texture you want to edit and click export. Edit it to your liking and save it. Now reopen your BRRES in BrawlBox and right click over the name of the texture you edited and click "Replace". Import with any color format. Replace it with the texture you edited and save it. Now open your SZS file in SZS Explorer and right click over the BRRES that you exported and click "Replace". Save your SZS.
Main Tutorials
Introduction –
Textures –
Scale –
Modeling ⇒ Using Blender –
BRRES: CTools
BRRES: BrawlBox –
BRRES: RiiStudio –
Minimap –
Solidity –
KCL: Wiimms Tools –
KMP Editing
Object Editing –
Cameras –
Cannons –
Post-effects –
Videos
Battle Arenas
Battle Arenas –
Enemy routes in battle arenas ⇒ Using Wiimm's Tools –
Coins
Misc. Tutorials
Getting Files –
BrawlBox Tricks –
Animations –
Shadows –
Mipmaps
Custom Effects –
Moving Terrain –
Music –
Ports –
Paint Remakes –
Tutorial Archive
Extended presence flags: Track Tutorial –
LE-CODE Track FAQ
Testing and Reviewing
Testing a Track –
Visual Review –
Track Transformation –
Fixing Errors
Software
3D Tools –
BrawlBox –
CTools Pack –
KMP3D –
KMP Cloud –
KMP Modifier
Lorenzi's KMP Editor –
MagicY –
Material Tool –
Post-Effect Editor –
Wiimms SZS Tools –
Wiimm's Tool Manager
Other
KMP Objects –
Custom Objects –
Model Database –
Tutorial Archive

