Difference between revisions of "BrawlBox Tricks"
Maczkopeti (talk | contribs) |
Omonimo747 (talk | contribs) m (→Optimization) |
||
| Line 82: | Line 82: | ||
:* the newest [[BrawlBox]] | :* the newest [[BrawlBox]] | ||
| − | Open the course_model in BrawlBox and go into MDL0 | + | Open the course_model in BrawlBox and go into MDL0. Right-click and click 'Optimize Meshes'. |
[[File:optimize-course-tut-optimize-dialog.png|left|400px]] | [[File:optimize-course-tut-optimize-dialog.png|left|400px]] | ||
<br clear="all"> | <br clear="all"> | ||
| Line 92: | Line 92: | ||
*[TextBox] - Minimum Strip Size - This says how low BrawlBox can strip the face-point amount. Don't bother changing this one. | *[TextBox] - Minimum Strip Size - This says how low BrawlBox can strip the face-point amount. Don't bother changing this one. | ||
| − | Click ok when done | + | Click ok when done. Now save your BRRES and import into the SZS file. Test in-game. |
=== Creating a Minimap === | === Creating a Minimap === | ||
Revision as of 14:12, 14 September 2014
This page describes several tricks to do in BrawlBox. For many parts in this article it's assumed you created the BRRES with CTools. If you want to know how to create a brres with BrawlBox look here: Creating a BRRES with BrawlBox
Material Related
Redirecting Materials
Sometimes, there are duplicate textures. This can create extra materials, adding unneeded strain on the Wii. You can fix this using BrawlBox.
You need:
- A course_model.brres with duplicate textures
- A copy of BrawlBox
Open your course_model.brres in BrawlBox and open the textures folder.
Find the file name of the duplicate texture. Copy down the original texture name.
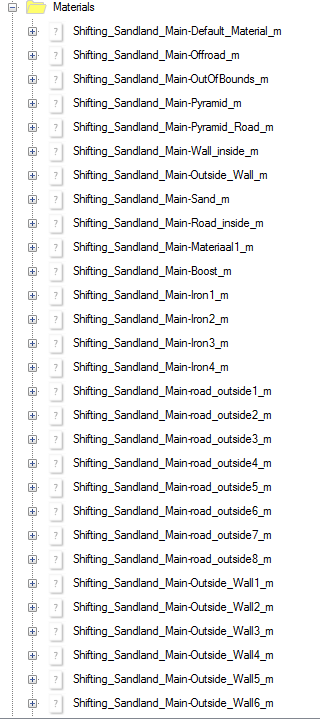
Go into the MDL0 and into the Materials Folder.
Find the material with the duplicate texture.
Using the original texture's name, open the material and rename the texture node to that.
Optional: You can delete the duplicate texture now.
Save the course_model.brres and import it into your SZS.
Opacity
To enable opacity on a mesh/polygon, browse to the mesh's material, found in the MDL0.
Set the following settings:
- Ref0 and Ref 1: 0
- Comp0 and Comp1: Always
- EnableBlend = true
- XLU Material = true (Will become true when you enable blend automatically, so dont worry about this)
- EnableAlphaFunction = false (This is for stuff with alpha that doesn't use EnableBlend)
- EnableDepthTest = true
- EnableDepthUpdate = false
You can also make a material (more) transparent by setting Constant Alpha Enabled = true and the Value to the value of transparency(0 = opague, 255 = fully transparent).
Mipmaps
A mipmap is a smaller, more pixelated version of a texture which is stored in most TEX0 files. In a 3D display, smaller mipmaps are rendered at farther distances. The bigger a texture is scaled, the farther you must go to trigger a smaller mipmap. Mipmaps may help reduce GPU load, reduce moiré pattern, and can also create the effect of textures changing based on distance. This is used on Rainbow Road on the road, and Lunar Spaceway on the stars which change color based on how far away you are from them. Mipmap 1 is the closest and biggest, and mipmap 4 or 5 is usually the smallest and farthest, however a TEX0 file can store any number of mipmaps as needed.
You need to do three things:
- Set mipmaps to display in the material: Browse to the "Materials" folder in the MDL0. Under each material's subfile(s) you will find the setting "MinFilter". Set it to Linear_Mipmap_Linear instead of Nearest.
- Make sure the TEX0 file the material uses actually has mipmaps.
Harry Potter Effect Fix
Open your BRRES in BrawlBox, open the MDL0 subfile, and then open the "Materials" subfolder. Browse to the material that represents a transparent texture that needs fixing, and set the transparent material's EnableAlphaFunction = true. Next, select the + button beside each material. Select the file the appears under the current selected file, and change the Texture Coordinate's scale from (0,0) to (1,1), as this will avoid your texture from becoming a solid color in game. Repeat the step with each material with each transparent material, and then set every material's (Whether transparent or not) Texture Coordinate scale to (1,1).
Important: If you are using a texture with opacity (a texture that is partially but not totally transparent), a different fix is needed, which is described at the top of the page; this fix is not necessary.
Don't know what the HP effect is? Harry Potter Effect
Culling
Special Culling settings are mostly used for transparent materials like fences. It makes you see this texture from both sides instead of one side. To set the culling, edit the CullMode setting in the material. Cull_none = you can see it from both sides.
Model Related
Optimization
With the newest BrawlBox, v0.71, It is possible to optimize a track's face-point count using BrawlBox's Tripstripper.
You need:
- a Course_Model.brres exported by SZS Explorer, Wiimm's SZS Tools or SZS Modifier
- the newest BrawlBox
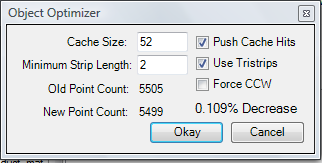
Open the course_model in BrawlBox and go into MDL0. Right-click and click 'Optimize Meshes'.
Dialog:
- [CheckBox] - Use Tripstrips - This enables the usage of the tripstripper. Have this on.
- [TextBox] - Cache Size - This often lowers the face-point amount, however it might not. Set this to a lower number.
- [TextBox] - Minimum Strip Size - This says how low BrawlBox can strip the face-point amount. Don't bother changing this one.
Click ok when done. Now save your BRRES and import into the SZS file. Test in-game.
Creating a Minimap
Since some may have trouble with properly creating a Minimap, here is a guide to teach you how to do so with BrawlBox.
Import your Map model into the CTools BRRES Editor. When importing, make sure to select "Map Model". Name it map_model.brres Save in an SZS, and export export your new map model.
Minimaps need to be adjusted to appear correctly in-game. This can be achieved with Wiimms SZS Tools or BrawlBox.
With BrawlBox, select "Preview" on the map model. A window with four buttons should appear. Select the one on the right, on the left, & on the bottom. Select "PosLD", which should be all the way to the right.
Now open the SZS containing your map_model.brres with the SZS Modifier. Open the BRRES, then select the model. The SZS Mod's model editor should open. Press "Tools > Minimap Control". Copy the number number from "Left Down". In BrawlBox, look down at the bottom panel, and paste this number into "Translation X". Now copy the second number from "Left Down", and paste it into "Translation Z".
Next, select "PosRU" in BrawlBox. Look at "Right Up" in the SZS Modifer's Minimap control. Do exactly what you did in the previous step; First number goes into "Translation X", and the second number into "Translation Z".
Experiment with editing the Y Translations & both PosLD & PosRU to give your Minimap depth. This allows you to use different Y values in your model.
Make Sure BRRES Works
Sometimes you may have a bit of trouble getting a BRRES made with CTools to open with BrawlBox, namely getting the MDL0 to open.
Luckily, there are multiple possible solutions to this problem:
- If you have 3ds Max or a similar powerful modelling program, delete any "default material" meshes using 3ds Max, then export using its OBJ exporter.
- Re-open your new BRRES with the CTools BRRES Editor. Save, and it should now open with BrawlBox. Remember that you will need to re-import any textures that you want to use mipmaps in BrawlBox, because CTools creates TEX0 files that refuse to display anything but the first mipmap.
- If for any reason the above methods failed, then you can open the SZS with your BRRES in it with the SZS Modifier. Open the Model with the SZS Modifier Model Editor, save, and the model should now work in BrawlBox.
Important! Sometimes the SZS Modifier will cause texture to become doubled in game after saving them. To resolve this issue, set every non-doubled texture's Texture Coordinate scale to (1,1), and every doubled texture's to (2,2).
If you use 3ds Max, you can add XForm UVW for all meshes with U and V 0,5 (Make sure "Apply to entire object" is ticked) to fix this problem. If you use SketchUp, just scale the materials for twice. (For example 2000 to 4000.)
Animation Related
SRT0
Port an Existing Animation
To port an existing animation, such as water, you will need to first export a base SRT0. First, extract a Nintendo track's SZS and then export the course_model.brres, then open it in BrawlBox. Then find AnmTexSrt(NW4R) and open it and export the SRT0 file. Next go into the MDL0, and go into the materials folder and find the material with the water in it. Export the references inside the material. Then click on the material and look which shader it is linked to. This is important, because layered materials need a different Shader than normal materials (otherwise skip the Shader steps). Export that shader. Then go to the textures folder and export the textures with the same names as the references (I.E. yo_wave_tex, ef_prj_glow.) Then open your course_model with BrawlBox. First right click on the BRRES and Import texture animation and import the SRT0. Then open the MDL0 (If BrawlBox can't open it then it's corrupt) and go to materials and find your water. Now import the material references and the shader. Make sure on that the shader links to the material (It's in the options bar).
Then replace your water texture with the other one you exported and import the others. Make sure they link to the references in the material.
Then copy the material name and rename the SRT0 entry to the same thing.
Save and import back into your SZS. DO NOT SAVE YOUR SZS WITH BRAWLBOX! It messes up the file locations and makes the track crash.
CLR0
yet to be done
PAT0
PAT0 files control swapping textures, like a computer GIF. It swaps through textures to simulate animation.
To do this, you need:
- Multiple textures to animate
- a Course_Model.brres exported by SZS Explorer, Wiimm's SZS Tools or SZS Modifier
Importing Textures
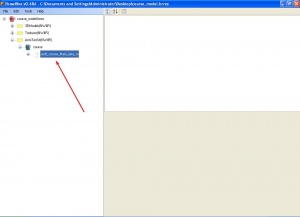
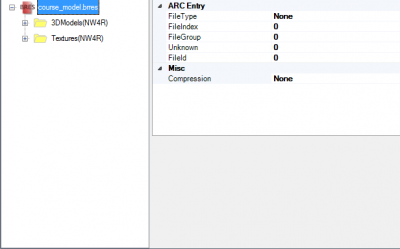
Open up your copy of Brawlbox and open your course_model.brres.
Right-click the image of the BRRES file in BrawlBox. If you have a folder with all your textures, click Import → Folder and browse for the folder. If not, click Import → Texture and import them one by one. Make sure they have the correct Image Format.
Creating a new PAT0 animation
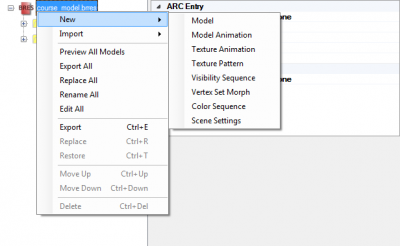
Once done importing new textures in Brawlbox, you'll want to create a new PAT0 animation by Right-Clicking the BRRES image and clicking New → Texture Pattern.
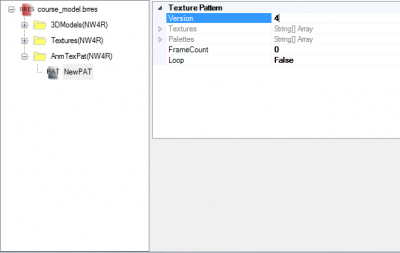
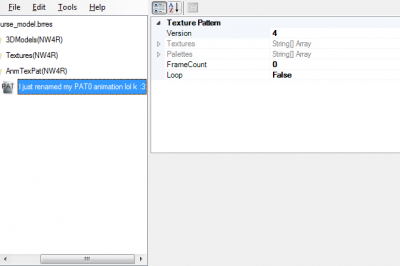
Go into AnmTexPat(NW4R) and click on NewPAT. Change the version number from 3 to 4. This is necessary because Mario Kart Wii uses a different version PAT0 than Super Smash Brothers Brawl.
You are free to rename the PAT0 to a different name. This will not effect the actual animation.
Set the FrameCount, as this dictates how long each texture will be on screen.
- NOTE! Depending on how many textures you have, this number will be different. For example, If I have 5 textures I want to animate, I'd need 60 frames, because texture 5 needs frames also, or else the animation will skip the fifth texture and go to the first (if you have it set to loop, if not, it'd just stop)
Creating and Linking Entries
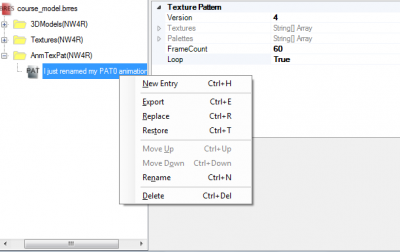
Now we'll get into the actual animating. To start off, right click the newly created PAT0 and click "New Entry".
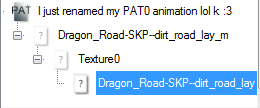
Click the + and you should see a node called "NewNode". Now, go into the MDL0 (it should be in 3DModels(NW4R)) Now go into MDL0 → Materials. You should see some materials. Find the one that has your texture first texture. Copy down the Material's name.
Go back to your PAT0 animation and rename the "NewNode" to the Material Name. This will link the Animation entry to the texture.
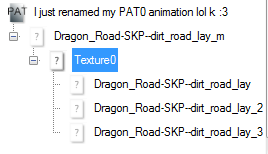
Now open the entry and Texture0. You should see a node called "NewTexture". Rename it to the actual texture name.
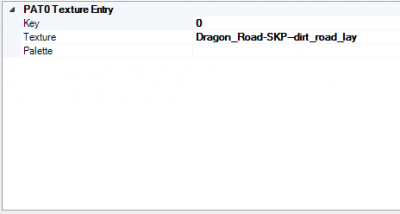
Take notice of the Option "Key". This dictates when the texture will start.
Now, right-click "Texture0" and click "New Entry". Do this for how many textures you have for animation. Rename those to the correct texture name.
Set the Key Frame Start for each one.
Save the BRRES and import it to your SZS. Test in-game to see if your animation works.
